
Add Podbean MCP to the ChatGPT Desktop App as a custom MCP server, then authorize your podcast. It takes about two minutes.
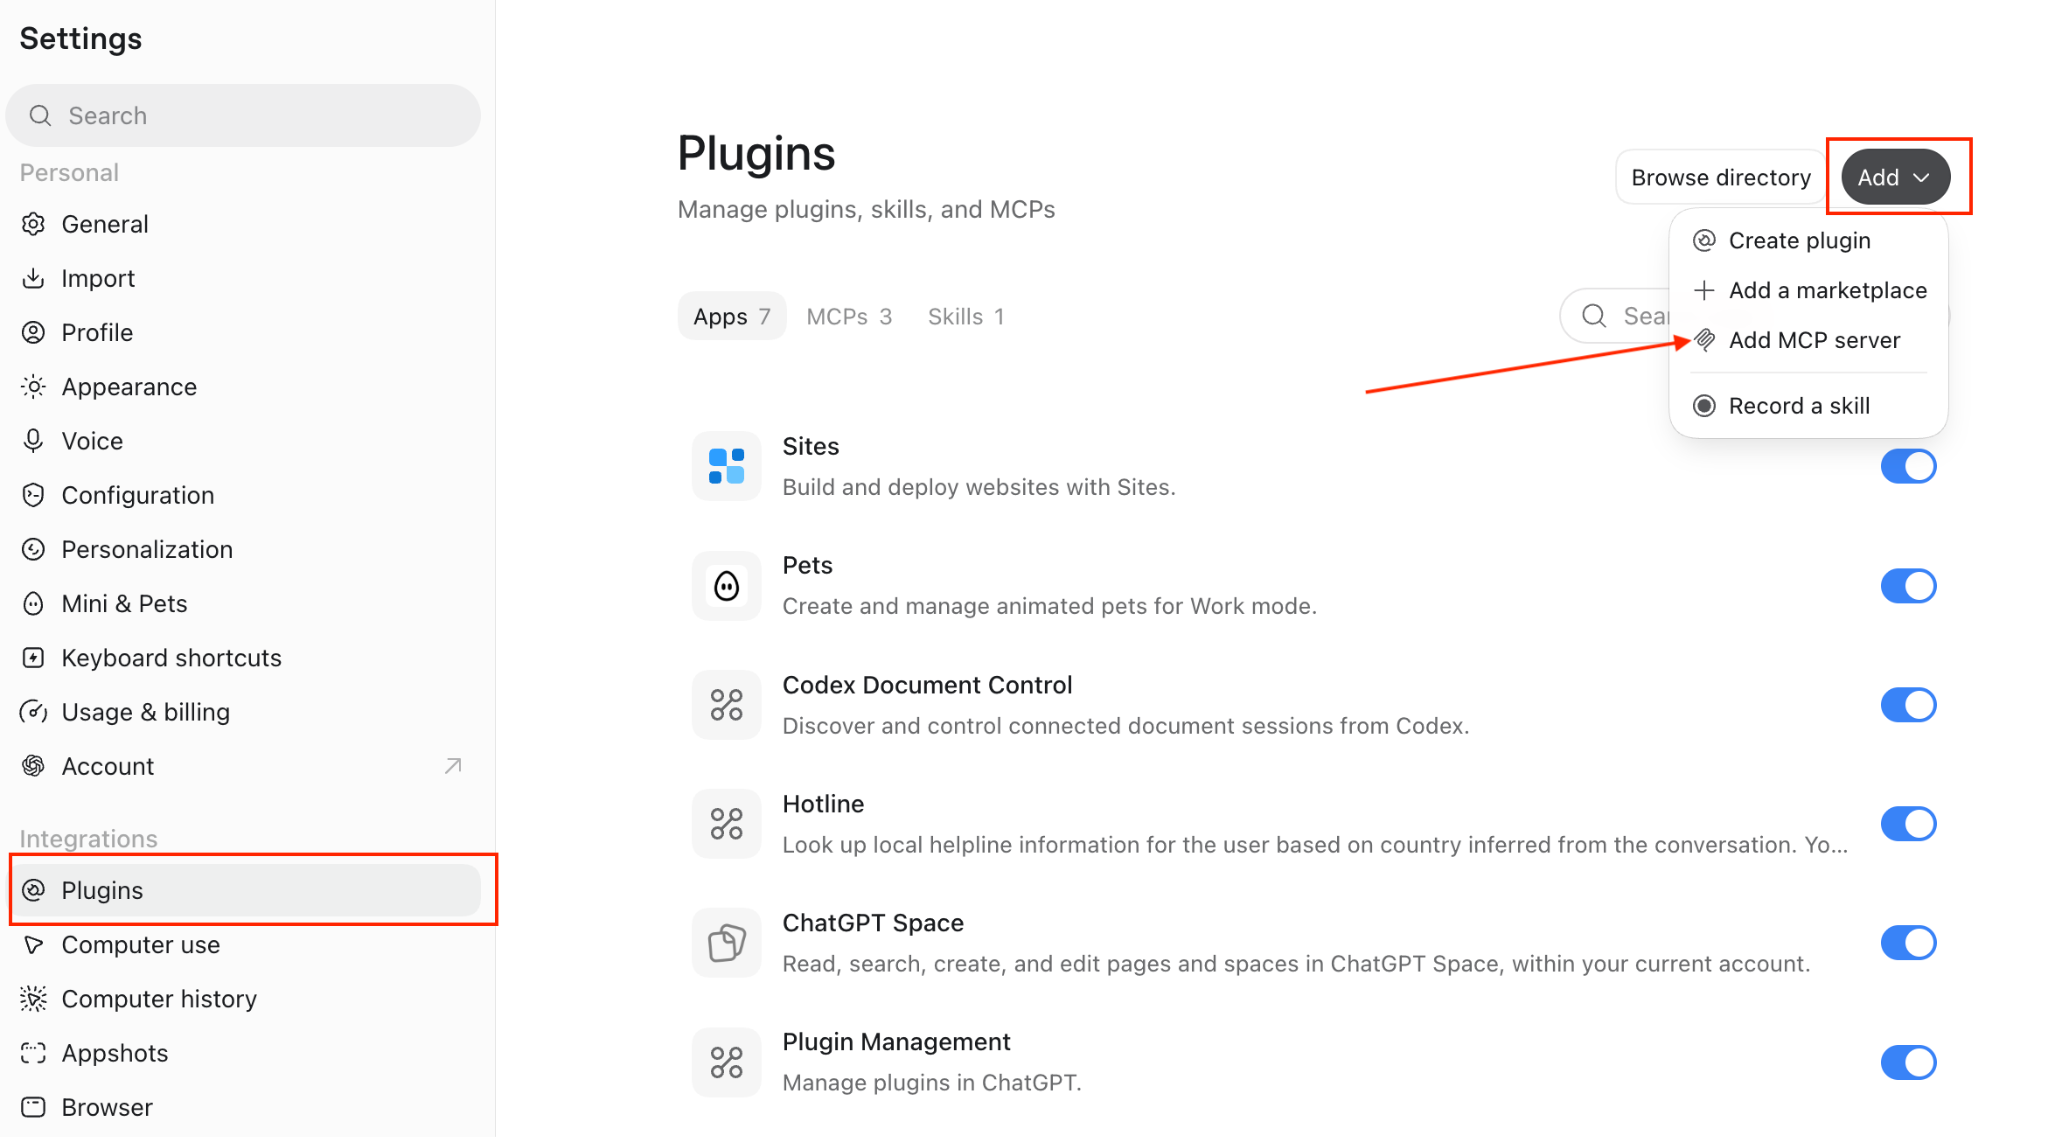
Open the ChatGPT Desktop App, go to Settings, and click Plugins (under Integrations).
Open the Add dropdown menu in the top right and select Add MCP server.
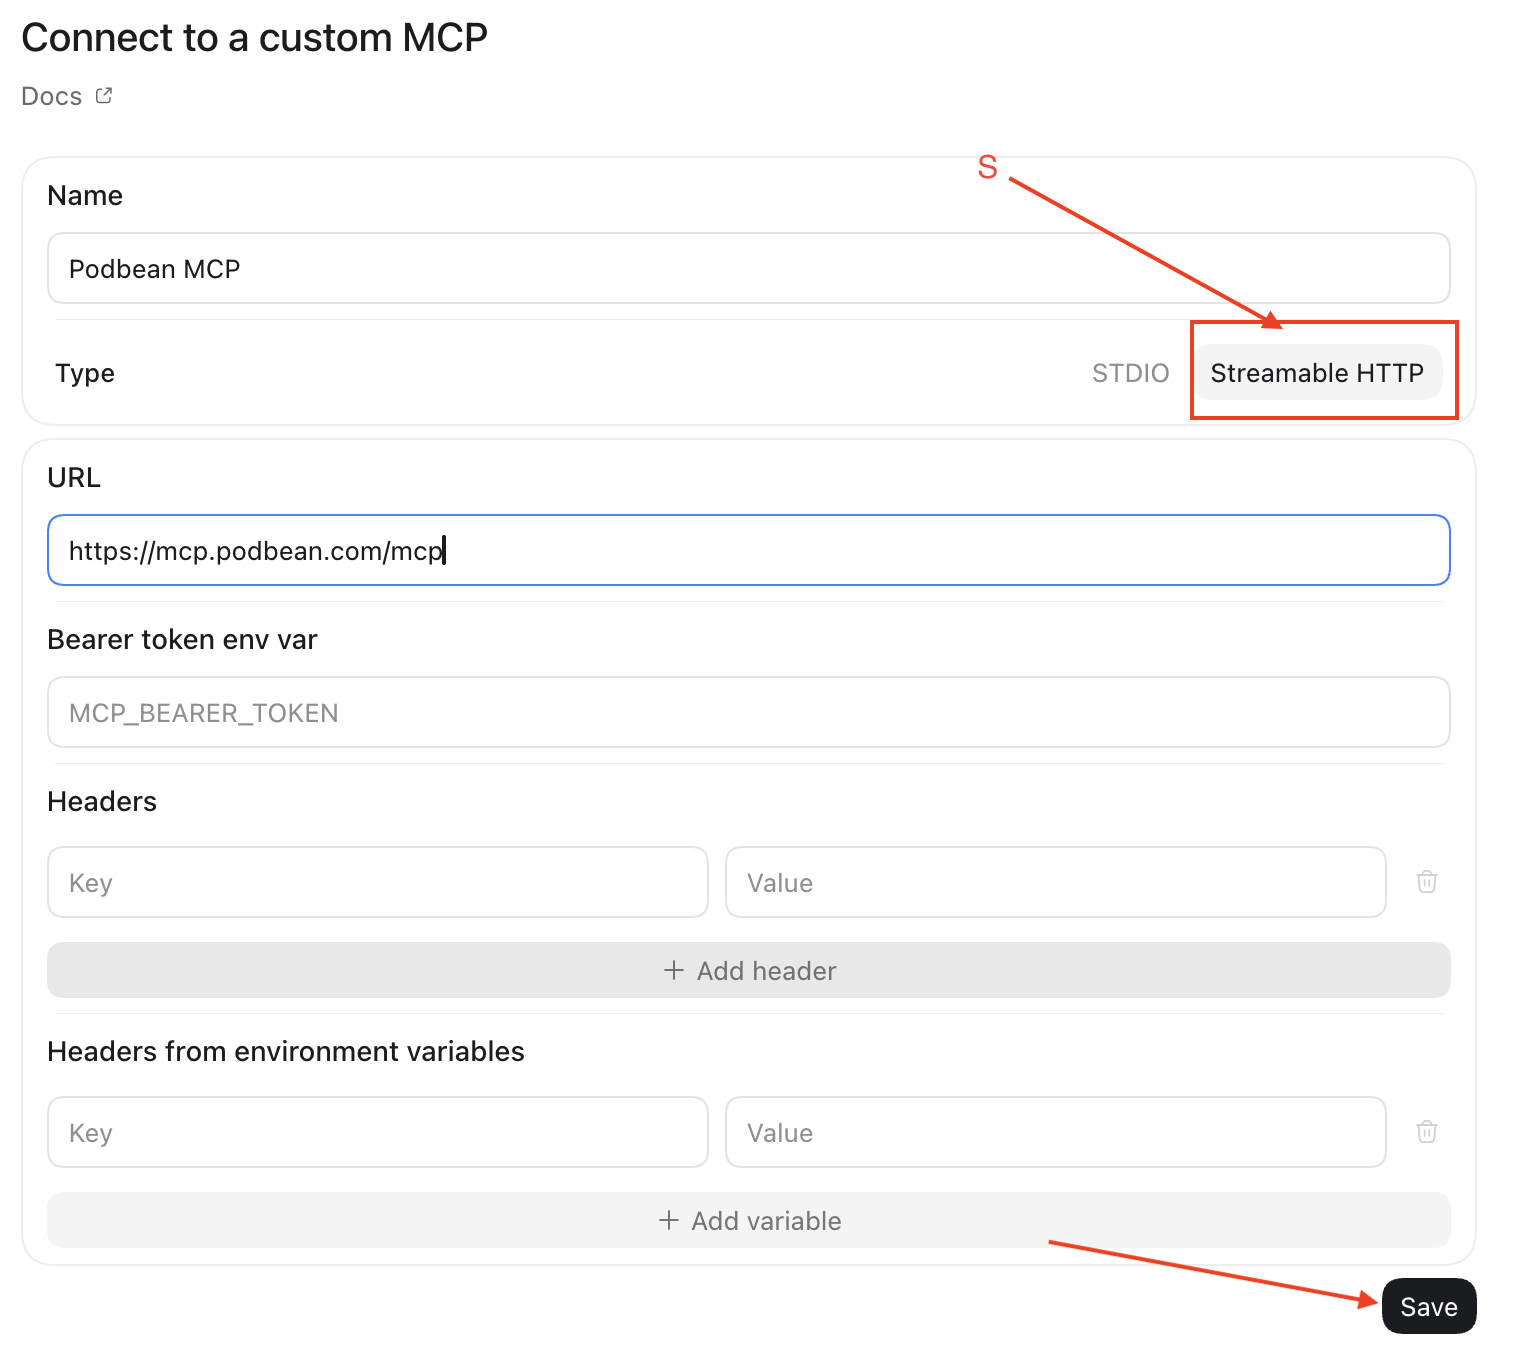
In the Connect to a custom MCP form, enter the name Podbean MCP, set the type to Streamable HTTP, and enter https://mcp.podbean.com/mcp as the URL. Leave the Bearer token and Headers fields empty — Podbean uses its own sign-in. Click Save.
Start a New Chat and type “Connect Podbean MCP Server”. Your browser opens Podbean’s sign-in page — log in and authorize your podcast when prompted.
Back in the chat, check that the right podcast is connected:
“What’s my podcast about?”
ChatGPT replies with your show’s title, description, category, and website.
ChatGPT never sees your Podbean password, and you can remove or disconnect the server at any time from Settings → Plugins.
Available actions depend on your app version, workspace settings, and Podbean plan.
Next: see what you can do — How to Publish and Manage Your Podcast with Podbean MCP.